Content Script
简述
在浏览器扩展中,Content Script内容脚本)是一种特殊的脚本。
它们在浏览器中运行,但与网页自身的 JavaScript 环境是隔离的。这个隔离环境通常被称为“隔离世界”(isolated world)。
这种设计有以下几个重要意义:
- 防止冲突 由于内容脚本运行在隔离的环境中,它不会直接与网页中原有的 JavaScript 代码或其他扩展的内容脚本相冲突。 这意味着,即使多个扩展都在同一网页上运行内容脚本,它们也不会相互干扰。
- 安全性 隔离世界确保了网页原有的 JavaScript 不能直接访问扩展的内容脚本,反之亦然。 这样做提高了安全性,防止恶意网站访问或修改扩展的内部逻辑。
- 保护用户数据 内容脚本可以访问网页内容和一些浏览器 API,但它们不能直接访问扩展的背景页(background page)或其他敏感数据。 这样做有助于保护用户数据不被未授权的脚本访问。
在 Plasmo 中 .ts 文件,会被认为是纯脚本文件(不包含 UI 组件)的代码文件。
同时 .tsx 则会被认为是 UI 脚本文件,需要有 UI 组件导出。
以下列举四种使用场景
- 从当前页面获取数据
- 从当前页面选择元素,并设置样式
- 将 UI 元素注入到当前页面 content-scripts-ui
- 将代码注入到 Main 上下文
Say Hi to Content Script
在 Plasmo目录新建一个 content.ts 或者 contents/index.ts 。
export {};
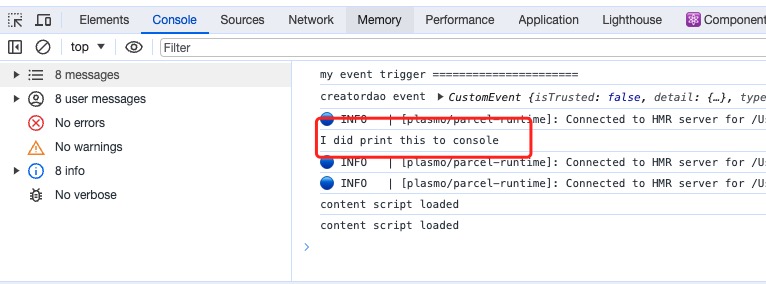
console.log("I did print this to console");
因为,plasmo 默认使用 typescript。 他那任何的一个文件当成一个 module。
如果你没有其他的 import 或者 export, 你需要在开头添加 export {};
重新加载你的扩展,打开任何一个页面,然后打开调试模式。
在 console 面板你将看到你��自己的输出。
官方参考实例 with-content-script
添加多个 Content Script
Plasmo 帮我们做了一件很酷的事情。
你可以在 contents 目录中新建多个 ts 文件,每个 ts 文件都会作为一个独立的 content-script 存在。
官方示例 : with-many-content-scripts
内容配置
有的时候,你想限制你的Content-script 的运行范围、运行位置等信息。
Plasmo 给每一个 Content-script 一个独立的配置,你可以通过 export 导出。
import type { PlasmoCSConfig } from "plasmo";

export const config: PlasmoCSConfig = {
  matches: ["<all_urls>"],
  all_frames: true,
};
涉及到的属性及写法,请参看 chrome 官方给出的解释:。
注入到主上下文
如果你想要修改 window 的对象,添加属性,或者方法。 那么,你需要 把你的脚本注入到 Main world。
import type { PlasmoCSConfig } from "plasmo";

export const config: PlasmoCSConfig = {
  matches: ["<all_urls>"],
  world: "MAIN",
};

window.mainMessage = "this is mainMessage hello world";
window.callProxy = {
  hello: () => {
    console.log("you call me from anywhere in the world");
  },
};
修改之前,你需要提前定义好 window 支持的 interface , 字段内容,或者方法。
interface Window {
  hello: {
    world: string;
    coolNumber: number;
  };

  mainMessage: string;
  callProxy: {
    hello: () => void;
  };
}
客户端调用一下
大多数浏览器扩展的 sdk 都是通过 content-script 注入一个全局变量。
同时客户端通过 全局变量的相关方法完成扩展的相关调用的。
<button onclick="clickHandle()">Click Me!!!</button>
<script>
  function clickHandle() {
    console.log(window.mainMessage);
    window.callProxy.hello();
  }
</script>
手工注入
手工注入脚本,你需要 chrome.scripting.executeScript 相关 API。
手工注入,运行在 background 的上下文中,权限也比直接在 content 中注入高一些。
最明显的一点, content 中的脚本必须遵守 CORS 的安全规则。
- 首先,你需要开启 script 权限
{
  ...
  "manifest" : {
    "permissions": ["scripting"]
  }
}
- 在 background.ts 中触发注入
import windowChanger from "./injected-helper";

export {};

const inject = async (tabId: number) => {
  chrome.scripting.executeScript(
    {
      target: {
        tabId,
      },
      world: "MAIN", // MAIN in order to access the window object
      func: windowChanger,
    },
    () => {
      console.log("Background script got callback after injection");
    }
  );
};

// Simple example showing how to inject.
// You can inject however you'd like to, doesn't have
// to be with chrome.tabs.onActivated
chrome.tabs.onUpdated.addListener((tabId, changeInfo, tab) => {
  const { status } = changeInfo;
  const { url } = tab;
  console.table({ url, status });
  if (url && !url.startsWith("chrome://") && status && status == "complete") {
    console.log("let me inject some script!!", changeInfo.status);
    inject(tabId);
  }
});
注入辅助函数:
export default function windowChanger() {
  const anotherFunc = (): number => {
    return 42;
  };

  // Here's an example where we can reference the window object
  // and add a new property to it
  window.hello = {
    world: "from injected content script",

    coolNumber: anotherFunc(),
    // you can call other functions from the injected script
    // but they must be declared inside the injected function
    // or be present in the global scope
  };

  // Here's an example where we show you can reference the DOM
  // This console.log will show within the tab you injected into
  console.log(document.getElementsByTagName("html"));
}
需要 scripts 的执行权限。
官方示例 : with-main-world